들어가며

Photo by Jan Antonin Kolar on Unsplash

웹서버가 제 기능을 하기 위해서는 DB도 필요하다. 서버에 mysql을 설치해서 nodejs서버에서 통신하는 것까지 해보려고 한다.


Mysql 설치

아래 명령어로 mysql server를 설치한다. - [1]

$ sudo yum install mysql-server

설치되었으면 systemctl을 이용해서 실행한다. 추가로 enable으로 서버가 재시작될 때 실행되도록 한다.

$ sudo systemctl start mysqld
$ sudo systemctl enable mysqld

mysql에 접속하기 전에 root 계정 설정을 해주어야 한다. 아래 명령어로 설정한다.

$ mysql_secure_installation

원하는 옵션으로 선택해서 비밀번호를 만든다. 설정한 비밀번호로 mysql에 접속한다.

$mysql -u root -p
Enter password:

비밀번호를 입력하면 mysql에 접속된다. 간단한 select문으로 테스트해본다.

mysql> select "Hello World!";
+--------------+
| Hello World! |
+--------------+
| Hello World! |
+--------------+
1 row in set (0.00 sec)


외부 접속 계정 생성

root 계정으로는 localhost에서만 접속이 가능하다. 새로운 계정을 생성해서 권한을 준다. - [2]

mysql> create user '<username>'@'%' identified by '<password>';
mysql> grant all privileges on *.* to '<username>'@'%';
mysql> flush privileges;

grant *.* 명령어를 이용해 모든 DB의 권한을 주었다. 특정 DB로 한정하기 위해서는 <DBname>.* 으로 줄 수도 있다.

외부에서 접근하기 위해 3306 포트를 열어준다.

$ sudo firewall-cmd --permanent --add-port=3306/tcp
$ sudo firewall-cmd --reload

reload 명령어로 방화벽을 적용하면 외부에서 접근이 가능하다. 

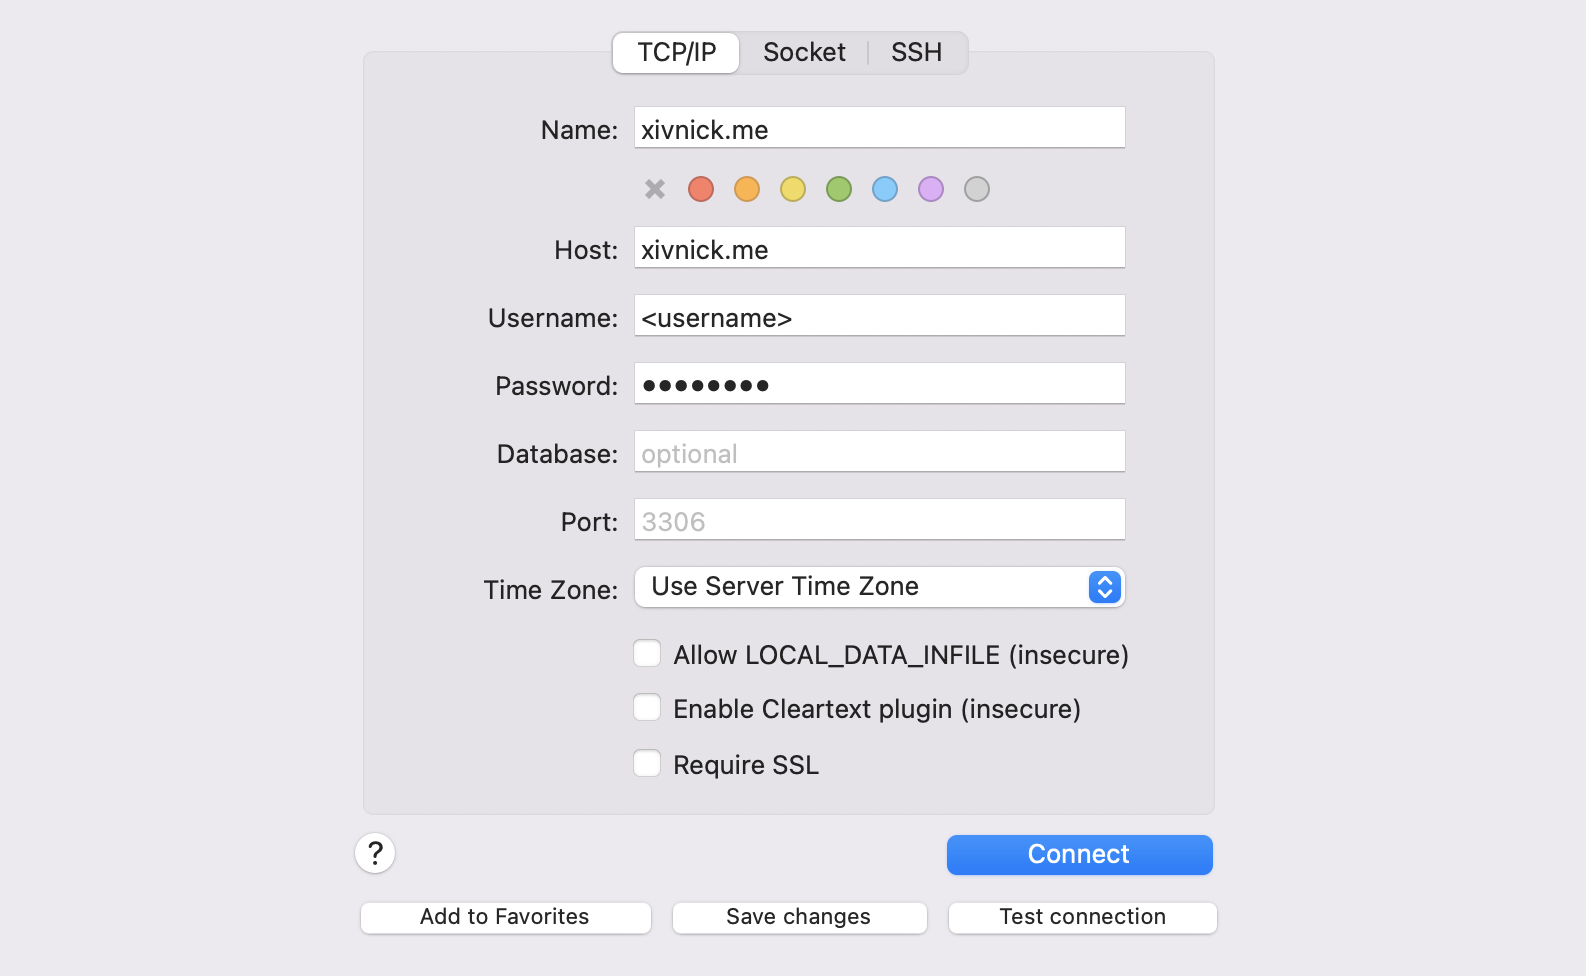
나는 Sequal Ace를 통해 접속했다. host에 도메인을 입력하고 username과 password를 맞게 입력하면 연결할 수 있다.


Mysql 테스트 프로젝트

mysql 연결 테스트를 위한 간단한 프로젝트를 만들 것이다. 우선 Mysql에 테스트용 DB를 생성한다.

mysql> CREATE DATABASE test;
mysql> USE test;
mysql> CREATE TABLE `message` (
  `id` int unsigned NOT NULL AUTO_INCREMENT,
  `message` varchar(255) DEFAULT NULL,
  PRIMARY KEY (`id`)
);
mysql> INSERT INTO message (message) VALUES ("Hello World!");

message 테이블을 만들고 Hello World! 데이터를 추가한다. 실제로는 Sequel pro 상에서 진행한다.


이제 node 프로젝트를 생성한다.

$ mkdir node-mysql-test
$ cd node-mysql-test
$ node -v
v18.2.0
$ npm init

노드 버전을 확인하고 npm init으로 새로운 프로젝트를 초기화한다.


mysql을 연결하기 위해서는 연결 정보가 필요한데, git에 올릴 수 없으므로 따로 db_config.json 파일을 만들어 저장한다.

{
	"host": "xivnick.me",
	"user": "<username>",
	"password": "<password>",
	"database": "test"
}

host는 역시 도메인이고, 해당하는 user와 password를 입력한다. json포맷이므로 마지막 줄에 ,(쉼표)를 넣지 않도록 주의한다.


이제 db 처리를 담당할 db.js를 생성한다.

const mysql = require('mysql2/promise');
const db_config = require('./db_config.json');

const queryFormat = (query, values) => {
	if (!values) return query;
	return query.replace(/:(\w+)/g, (txt, key) => {
  		if (Object.prototype.hasOwnProperty.call(values, key)) {
   			return mysql.escape(values[key]);
  		}
  		return txt;
	});
}

const pool = mysql.createPool({
	host: db_config.host,
	user: db_config.user,
	password: db_config.password,
	database: db_config.database,
	queryFormat,
});

module.exports = {
	pool,
};

db.js에서는 mysql 모듈을 가져와 pool을 생성해 반환한다.

queryFormat은 sql injection을 방지하기 위한 escape 코드이다. 이번 프로젝트에서 사용하지는 않지만 추가했다. - [3]

db_config에서 설정을 가져와 createPool의 파라미터를 입력한다. db_config는 같은 폴더에 있도록 구성했다.


db 구성이 준비되었으니 서버의 메인 파일 index.js를 작성한다.

const express = require('express');
const app = express();
const port = process.env.PORT || 3000;

const DB = require('./db');

app.get('/', async (req, res) => {

	const [ messages ] = await DB.pool.query('SELECT * FROM message');

	return res.send(messages);
});

app.listen(port, () => {
  console.log(`Node Mysql Test app listening on port ${port}`);
});

루트로 접근하면 DB에서 select 쿼리를 수행해 리턴해주는 서버 코드다.

포트가 3000으로 이전 프로젝트와 같으면 실행할 수 없으므로 환경변수에서 PORT를 가져와주고, 없다면 그대로 3000으로 실행한다.

$ npm i express mysql2
$ node index.js
Node Mysql Test app listening on port 3000

npm으로 필요한 모듈을 설치하고 서버를 실행한다. 따로 환경변수를 설정하지 않았기 때문에 3000번 포트로 실행된다.

[{"id":1,"message":"Hello World!"}]

localhost:3000으로 접속하면 위 결과를 얻을 수 있다.


Git 설정하기

프로젝트를 서버로 옮기기 위해 git에 올린다. git에 올리지 않을 파일들을 .gitignore 파일에 추가한다.

node_modules/
db_config.json

기존에도 추가했던 node_modules/ 외에 password가 저장되어 있는 DB 설정 파일도 git에서 제외한다.


github에서 레포지토리를 생성한다. 안내 문구에 따라 다음 명령어를 실행한다.

$ git init
$ git add .
$ git commit -m "first commit"
$ git branch -M main
$ git remote add origin git@github.com:xivnick/node-mysql-test.git
$ git push -u origin main

ssh로 서버에 접속해서 클론한다.

$ git clone git@github.com:xivnick/node-mysql-test.git

git에서 다운로드한 파일에는 db_config가 빠져 있으므로 파일을 생성해준다.

$ cd node-mysql-test
$ vi db_config

config 파일은 위에서 작성한 것과 같이 작성한다.

{
	"host": "xivnick.me",
	"user": "<username>",
	"password": "<password>",
	"database": "test"
}

아래 명령어로 필요한 모듈도 설치해 준다.

$ npm install

실행하더라도 기본 port가 겹칠뿐더러, 방화벽도 닫혀있기 때문에 서비스를 만들어서 실행하도록 하자.


시스템 서비스 설정

시스템 서비스 파일을 만들어준다. - [4]

$ vi node-mysql-test.service

해당 파일은 이전과 비슷하게 적어 주되, PORT=3001이라는 환경 변수를 추가해준다. - [5]

[Unit]
Description=Node.js Mysql Test Project

[Service]
Environment="PORT=3001"
ExecStart=/home/xivnick/.nvm/versions/node/v18.2.0/bin/node index.js
Restart=always
User=xivnick
WorkingDirectory=/home/xivnick/node-mysql-test/

[Install]
WantedBy=multi-user.target

만든 시스템 파일을 링크해준다.

$ sudo systemctl link /home/xivnick/node-mysql-test.service
$ sudo systemctl start node-mysql-test

이제 3001번 포트에서 노드 서버가 실행된다.


Nginx 설정

마찬가지로 subdomain을 연결해 준다. - [6]

$ sudo vi /etc/nginx/sites-available/test2.conf

우선 sites-available에 test2 설정 파일을 만들어 아래 내용을 적는다.

server {
	listen 80;

	server_name test2.xivnick.me;

	return 301 https://$host$request_uri;	
} 

server {
    listen 443 ssl;

    server_name test2.xivnick.me;

	ssl_certificate /etc/letsencrypt/live/xivnick.me/fullchain.pem;
    ssl_certificate_key /etc/letsencrypt/live/xivnick.me/privkey.pem;

    location / {
        proxy_pass http://localhost:3001;
        proxy_set_header Host $host;
        proxy_set_header X-Real-IP $remote_addr;
        proxy_set_header X-Forwarded-For $proxy_add_x_forwarded_for;
        proxy_set_header X-Forwarded-Proto $scheme;
    }
}

앞서 했던 설정 파일과 큰 차이가 나지는 않는다. 서브도메인과 연결해주는 port정도의 차이가 있다.

$ sudo ln -s /etc/nginx/sites-available/test2.conf /etc/nginx/sites-enabled/test2.conf
$ sudo systemctl restart nginx

enable 폴더에 링크를 걸어주고 Nginx를 재시작한다. 이제 test2.<domain>으로 접속을 확인할 수 있다!


Reference

[1] https://info-lab.tistory.com/172

[2] https://velog.io/@jdk9908/외부에서-MySQL-접속하기

[3] https://github.com/mysqljs/mysql/issues/1626

[4] https://xiv-dev.tistory.com/5

[5] https://serverfault.com/questions/413397/how-to-set-environment-variable-in-systemd-service

[6] https://xiv-dev.tistory.com/6 


들어가며

Photo by Markus Winkler on Unsplash

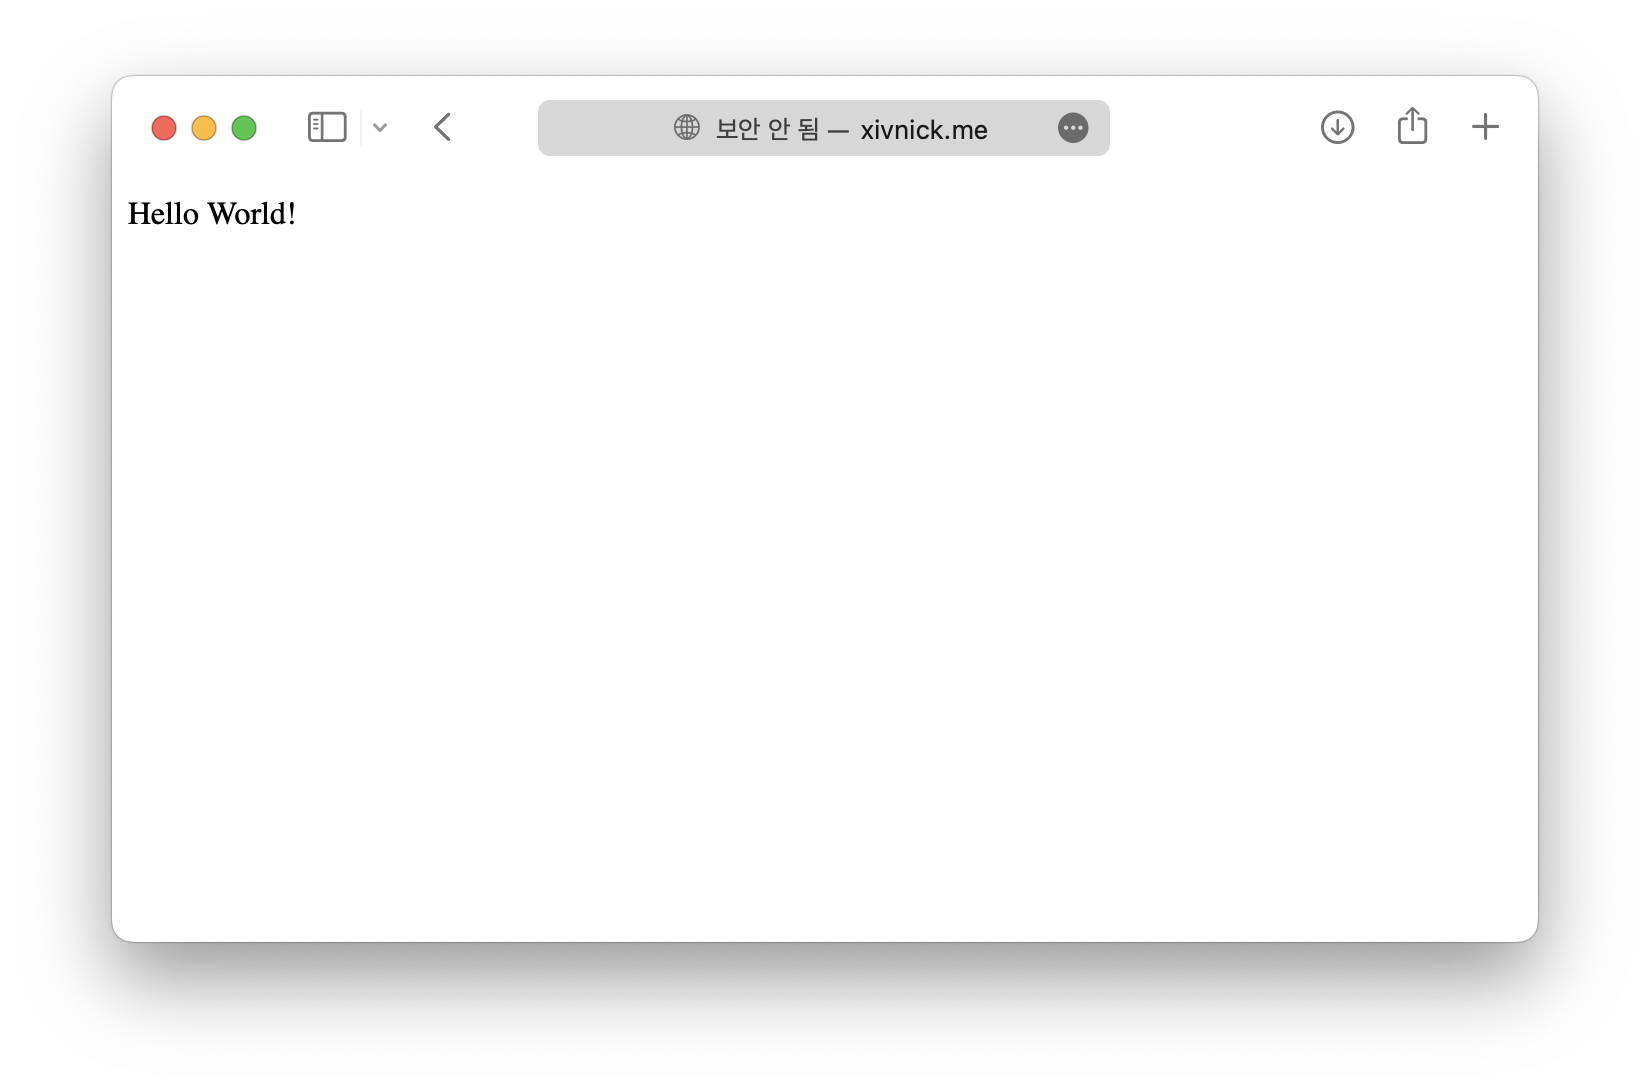
이전 글에서 만든 서버에 접속하면 보안 안됨 경고가 뜨는데, 이는 http 연결을 사용하고 있기 때문이다. 이번 글에서는 Let's encrypt를 이용하여 https 연결을 구축하려고 한다.


Let's encrypt 인증서 설치

인증서 발급을 위해 certbot을 설치해야 한다. - [1]

$ sudo yum install epel-release
$ sudo yum install certbot


epel 저장소를 추가한 후 certbot을 설치해 준다.

* centOS9에서는 yum으로 certbot을 설치할 수 없다. 대신 snap을 이용할 수 있다. - [2]

* 여기서는 그냥 centOS8로 다운그레이드하고 새로 세팅했다.

와일드카드 인증을 위해 아래 명령어를 실행한다. - [3]

$ sudo certbot certonly --manual -d *.xivnick.me -d xivnick.me --preferred-challenges dns

*.xivnick.me와 xivnick.me 도메인을 등록하는데, 소유 인증 방식은 dns를 이용하겠다는 뜻이다.

(와일드카드 인증을 위해서는 dns 추가만 가능한데, 이 경우에는 자동 갱신이 되지 않으니 주의한다.)

이메일을 입력하고 동의를 두 번 누르고 나면 아래와 같은 메시지가 뜬다.

Please deploy a DNS TXT record under the name:

_acme-challenge.xivnick.me.

with the following value:

n74WNHAG1oGRtyCvLOTk1S0Y45O0p83jDDVhGmXdkYo

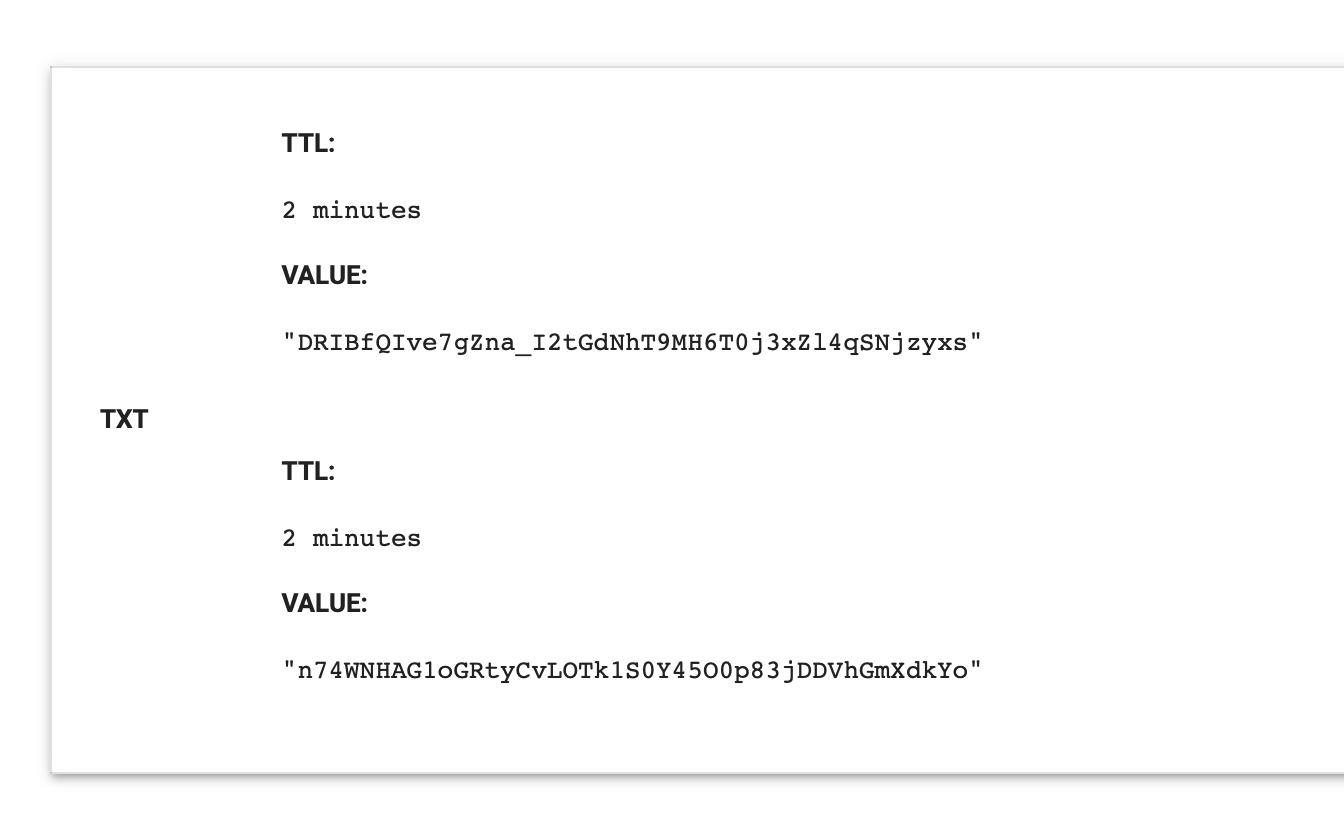
DNS 설정에서 _acme-challenge에 코드를 추가하여야 한다. Vultr로 연결해 두었으므로 Vultr에서 설정한다.

VULTR : Product - DNS - xivnick.me

이때 하나 더 추가해야 하기 때문에 TTL을 짧게 설정하는 것이 좋다. 기본인 3600으로 설정하면 한 시간을 기다려야 갱신된다.

다시 콘솔에서 엔터를 한번 더 누르면 위 메시지가 한번 더 뜬다. 도메인을 두 개 추가하기 때문인 것 같다.

Please deploy a DNS TXT record under the name:

_acme-challenge.xivnick.me.

with the following value:

DRIBfQIve7gZna_I2tGdNhT9MH6T0j3xZl4qSNjzyxs

(This must be set up in addition to the previous challenges; do not remove,
replace, or undo the previous challenge tasks yet. Note that you might be
asked to create multiple distinct TXT records with the same name. This is
permitted by DNS standards.)

Before continuing, verify the TXT record has been deployed. Depending on the DNS
provider, this may take some time, from a few seconds to multiple minutes. You can
check if it has finished deploying with aid of online tools, such as the Google
Admin Toolbox: https://toolbox.googleapps.com/apps/dig/#TXT/_acme-challenge.xivnick.me.
Look for one or more bolded line(s) below the line ';ANSWER'. It should show the
value(s) you've just added.

추가한 후에 바로 엔터를 누르면 안 되고, 적힌 링크(https://toolbox.googleapps.com/apps/dig/)로 들어가 제대로 등록이 갱신되어 있는지 확인해야 한다.

Google 관리 콘솔 도구 상자&nbsp;Dig

두 개를 넣었기 때문에 두 개가 모두 나와야 정상이다. 하나만 뜬다면 설정한 TTL시간을 기다렸다가 다시 요청해본다.

Successfully received certificate.
Certificate is saved at: /etc/letsencrypt/live/xivnick.me/fullchain.pem
Key is saved at:         /etc/letsencrypt/live/xivnick.me/privkey.pem
This certificate expires on 2022-08-31.
These files will be updated when the certificate renews.


두 개가 뜬 것을 확인하고 엔터를 누르면 위와 같은 결과 화면이 나오게 된다.


Nginx 설정하기

nginx가 ssl 설정을 사용하고, http로 들어온 요청을 https로 리다이렉트 해주기 위해 설정을 변경해준다.

$ sudo vi /etc/nginx/sites-available/test.conf

이전에 작성했던 test.conf를 열고 아래 내용으로 새로 작성한다.

server {
	listen 80;

	server_name test.xivnick.me;

	return 301 https://$host$request_uri;	
} 

server {
        listen 443 ssl;

        server_name test.xivnick.me;

	ssl_certificate /etc/letsencrypt/live/xivnick.me/fullchain.pem;
        ssl_certificate_key /etc/letsencrypt/live/xivnick.me/privkey.pem;

        location / {
                proxy_pass http://localhost:3000;
                proxy_set_header Host $host;
                proxy_set_header X-Real-IP $remote_addr;
                proxy_set_header X-Forwarded-For $proxy_add_x_forwarded_for;
                proxy_set_header X-Forwarded-Proto $scheme;
        }
}

80 포트로 들어온 요청은 https로 리다이렉트 하고, 443으로 들어온 요청은 아까 만들어진 pem key를 통해 인증한 후 nodejs 서버로 proxy pass 해준다.

$ sudo systemctl restart nginx

nginx를 재시작해주면 test.xivnick.me로 접속했을 때 https로 연결된다!


인증서 갱신 준비

와일드카드를 위한 DNS인증의 경우 자동 갱신을 할 수 없다. (certbot이 DNS인증이 불가능하기 때문)

때문에 시기에 맞춰서 갱신을 해주어야 한다. certificates를 이용하면 인증 기간을 확인할 수 있다.

$ sudo certbot certificates
$ sudo certbot certonly --manual -d *.xivnick.me -d xivnick.me --preferred-challenges dns


인증 명령어를 다시 입력하면 갱신할 수 있다.

Saving debug log to /var/log/letsencrypt/letsencrypt.log
Certificate not yet due for renewal

You have an existing certificate that has exactly the same domains or certificate name you requested and isn't close to expiry.
(ref: /etc/letsencrypt/renewal/xivnick.me.conf)

What would you like to do?
- - - - - - - - - - - - - - - - - - - - - - - - - - - - - - - - - - - - - - - -
1: Keep the existing certificate for now
2: Renew & replace the certificate (may be subject to CA rate limits)
- - - - - - - - - - - - - - - - - - - - - - - - - - - - - - - - - - - - - - - -
Select the appropriate number [1-2] then [enter] (press 'c' to cancel):

지금은 위처럼 renewal 기간이 아니라고 하고, 2를 선택하면 갱신이 되는 것 같다.

Let's Encrypt는 3개월마다 갱신이 필요하니까, 시기를 잘 맞추도록 하자.

필요하다면 네이버 클라우드 플랫폼 등에 등록하여 알림을 받을 수 있다. - [4]


Reference

[1] https://jootc.com/p/201901062488

[2] https://www.linuxcapable.com/ko/how-to-install-apache-on-centos-9-stream/

[3] https://oasisfores.com/letsencrypt-wildcard-ssl-certificate/

[4] https://bboggi.com/entry/linux-CentOS-78에-무료SSL-인증서-Lets-encrypt-발급-및-설치


들어가며

Photo by Let's go Together on&nbsp; Unsplash

이전 글에서 IP주소와 port로 서버에 접속할 수 있게 되었다. 하지만 12자리의 IP주소는 외우기 어렵고, port 또한 좋지 않기 때문에 도메인을 구입해 연결하고 nginx를 이용하여 subdomain으로 원하는 port에 연결해보도록 하자.


도메인 연결하기

우선 사용할 도메인을 구입한다. 나는 가비아에서 구입했다. 


웹을 넘어 클라우드로. 가비아

그룹웨어부터 멀티클라우드까지 하나의 클라우드 허브

www.gabia.com

hosting.kr 같은 선택지도 있고, 연습용이라면 freenom에서 무료 도메인을 임시로 할당받을 수도 있다.

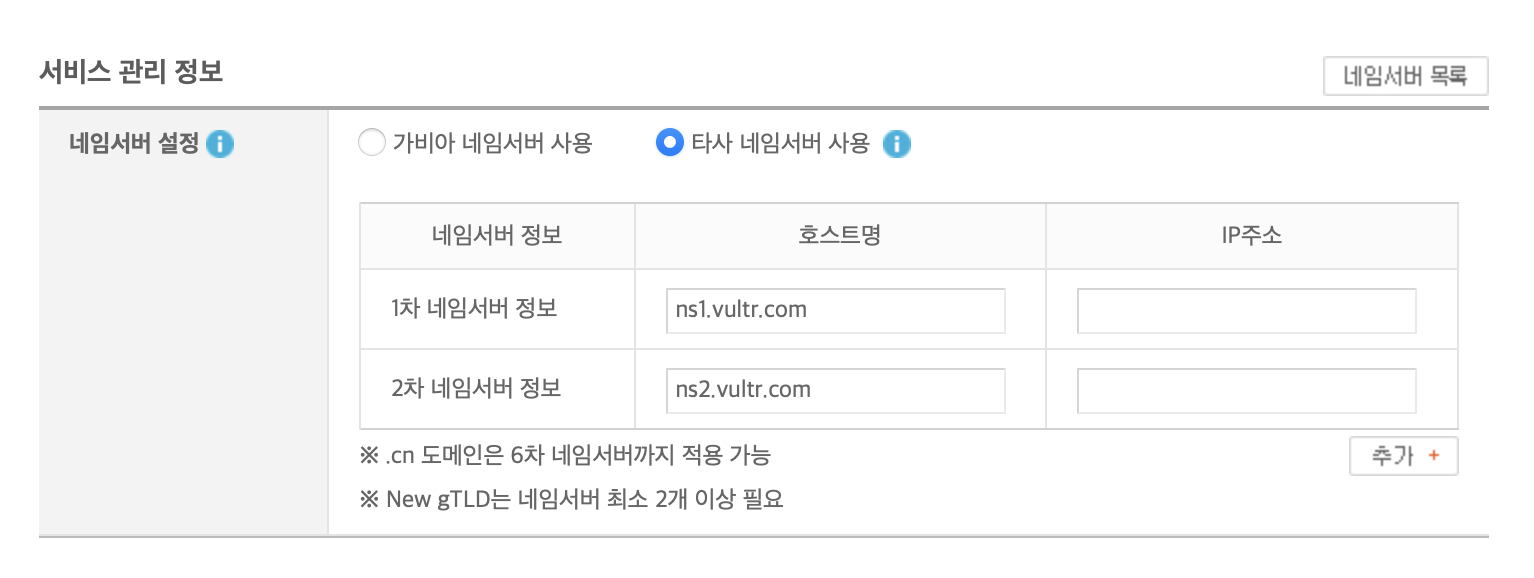
가비아에서 도메인을 구입할 때 vultr에 연결하기 위해 네임서버를 ns1.vultr.com, ns2.vultr.com으로 등록한다. - [1]

Vultr에서 Product-DNS 탭으로 들어가 새 도메인을 추가한다.

VULTR : Products - DNS - New Domain

이때 아래에 등록된 인스턴스의 IP를 선택해서 추가할 수 있다.

네임서버 업데이트에 시간이 좀 걸리기 때문에, 잠시 기다리면 <domain>:3000으로 접속해서 Hello World를 확인할 수 있다.

도메인이 연결되었기 때문에 이제 ssh 접속도 도메인을 통해 가능하다.


Nginx 서버 설정하기

먼저 서버에 nginx를 설치한다. nginx를 설치하기 위해서는 yum repo를 등록해야 한다.

$ sudo vi /etc/yum.repos.d/nginx.repo

nginx.repo를 생성하고 아래 내용을 입력한다. - [2]

[nginx]
name=nginx repo
baseurl=https://nginx.org/packages/centos/$releasever/$basearch/
gpgcheck=0
enabled=1

파일을 저장하고 yum을 이용해 nginx를 설치한다.

$ sudo yum install nginx
$ nginx -v
nginx version: nginx/1.22.0

nginx 버전은 CentOS 버전에 따라 달라질 수 있다. CentOS8을 사용할 경우 1.14 버전이 설치되었다.

nginx 설정은 /etc/nginx/nginx.conf에서 확인할 수 있다.

$ cat /etc/nginx/nginx.conf

방화벽 포트를 열고 nginx를 실행한다.

$ sudo firewall-cmd --permanent --zone=public --add-service=http
$ sudo firewall-cmd --permanent --zone=public --add-service=https
$ sudo firewall-cmd --reload
$ sudo systemctl start nginx

 여는 김에 https 포트도 함께 열고 reload 했다. systemctl을 이용해 nginx를 실행한다.

xivnick.me로 접속하면 nginx 기본 페이지가 뜬다!


서브도메인 연결하기

이제 서브도메인을 이용하여 test.xivnick.me를 3000 포트를 듣고 있는 nodejs 서버로 연결해 줄 것이다. 이를 위해 nginx에 서버 설정을 추가해서 proxy pass를 해주어야 한다.

nginx에 서버 설정을 추가하는 방법은 여러가지가 있다.

  1. /etc/nginx/nginx.conf 파일에 직접 추가
  2. /etc/nginx/conf.d 폴더에 .conf파일 추가
  3. 새로운 폴더에 .conf파일 추가하고 nginx.conf에서 Include 하기

1,2번이 더 간단하지만, 확장성을 위해 여기서는 3번을 이용할 것이다. 주로 sites-available과 sites-enabled 폴더를 생성하여 available에 설정 파일을 보관하고, enabled에 링크로 연결하여 nginx.conf에서는 enabled만 include 하는 방식을 사용한다.

nginx server block 튜토리얼을 참고하여 폴더를 생성하고 설정 파일을 만든다. - [3]

$ sudo mkdir /etc/nginx/sites-available
$ sudo mkdir /etc/nginx/sites-enabled
$ sudo vi /etc/nginx/sites-available/test.conf

위 명령어로 폴더를 생성하고 파일을 연다. test.conf에는 proxy pass를 위한 설정 파일을 작성한다. - [4]

server {
        listen 80;

        server_name test.xivnick.me;

        location / {
                proxy_pass http://localhost:3000;
                proxy_set_header Host $host;
                proxy_set_header X-Real-IP $remote_addr;
                proxy_set_header X-Forwarded-For $proxy_add_x_forwarded_for;
                proxy_set_header X-Forwarded-Proto $scheme;
        }
}

test.xivnick.me로 들어오는 요청을 localhost:3000으로 연결해주는 설정 파일이다.

test.xivnick.me 부분은 원하는 <subdomain>.<domain>형태로 적으면 된다.

$ sudo ln -s /etc/nginx/sites-available/test.conf /etc/nginx/sites-enabled/test.conf
$ sudo vi /etc/nginx/nginx.conf

만든 test.conf의 링크를 enabled 폴더에 생성한 후 nginx.conf의 http 블록 마지막에 아래 코드를 추가해준다. - [3]

include /etc/nginx/sites-enabled/*.conf;
server_names_hash_bucket_size 64;

기존에 conf.d 폴더에 있는 .conf파일을 include 한 것처럼 sites-enabled의 .conf파일들도 include 하는 코드이다.

두 번째 줄은 도메인을 늘렸기 때문에 네임 해시를 늘리는 코드라고 한다. (레퍼런스 참조)

$ sudo systemctl restart nginx

위 명령어로 nginx를 재시작하면 test.xivnick.me로 접속해서 nodejs의 Hello World! 를 확인할 수 있다!


이제 3000번 포트는 사용하지 않으니 다시 닫아준다. - [5]

$ sudo firewall-cmd --permanent --remove-port=3000/tcp
$ sudo firewall-cmd --reload

reload로 재시작하면 이제 3000 포트는 닫히고 test.xivnick.me로만 접속할 수 있게 된다.


IP 접속도 도메인으로 redirect 하기

포트를 닫고 나니 IP로 접속했을 때도 도메인으로 넘겨주고 싶어서 추가로 작성한다.

$ sudo vi /etc/nginx/conf.d/redirect-ip.conf

이번에는 한 서버에 해당하는 내용은 아니라서 conf.d 폴더 내에 설정 파일을 추가했다.

server {
	listen 80;

	server_name <Server-IP>;
	return 301 $scheme://xivnick.me$request_uri;
}


서버 아이피로 들어온 요청을 301을 이용하여 xivnick.me로 넘겨주는 설정 파일이다. - [6]

$ sudo systemctl restart nginx

위 명령어로 nginx를 재시작하면 ip로 접속했을때 xivnick.me로 redirecting 되는 것을 확인할 수 있다.


Reference

[1] https://www.vultr.com/docs/introduction-to-vultr-dns

[2] https://www.nginx.com/resources/wiki/start/topics/tutorials/install/

[3] https://www.digitalocean.com/community/tutorials/how-to-set-up-nginx-server-blocks-on-centos-7

[4] https://velog.io/@iamsupercool/Nginx-proxy-pass-설정

[5] https://uxgjs.tistory.com/162

[6] https://memorynotfound.com/nginx-redirect-ip-address-domain-name/


+ Recent posts